Sunday 7 December 2014

Adventures with Lino Printing

This is just a quick post to share some little lino prints that I made using this lovely kit that my partner bought me for Christmas.

I'd been meaning to have a go at lino printing for years, having often admired other people's work, and it was great fun to finally get stuck in.  

For my first go I carved an image based on one of my own paintings from years ago, and ran off a few prints.  


For the second image, I tried something new. I had the idea that planning out my design using white chalk on black paper would feel as close as possible to the creative process of lino-carving - (i.e. if I can get it to work using white chalk, then it ought to work as a carved out piece of lino... yes?)


As it turned out, the theory was quite right and I'd recommend it. However I did make a few clumsy cutting errors in this one that stopped the final image from being quite as successful as I'd hoped. Lino is nothing if not unforgiving!


Now I have the bug - I just need to find the time to do some more... 


Saturday 22 November 2014

Honeycomb tissue paper

Hello dear old craft blog. Here's a rapid fly-by just to mention my recent discovery of honeycomb paper...


I presume this is the stuff that paper xmas decorations are made of, but I hadn't realised you could buy it in sheets for crafty shenanigans.  Good old Pinterest enlightened me and the microbe and I have had a go at using it today for a trio of children's 'pop-up' birthday cards.


If you're in the UK and fancy giving it a try, you can get honeycomb paper on Amazon and Ebay.  (Mine came from a seller called Lyndie's Craft).

The sheets are a bit smaller than A4 and it seems as though you can cut out pretty much any shape in cross-section in order to get a 3d effect.  I expect you could use it to make a garland of paper spheres too.

Well... that's it.  A fly-by as promised.  Toodle pip.


Sunday 12 October 2014

Adventures with ProMarker Pens

This post is dedicated to my discovery of some great little pens that are a joy to draw with and can be layered almost like watercolour paint.

These Letraset Promarkers come in 1001 colours and are really marketed at graphic and comic-book artists, but a local painter named Stephanie Wilkinson showed me how you can use them with high grade watercolour paper to get quite a different result.

It was in her workshop that I did this sample piece, using a style that she refers to as ‘pattern painting’.


Unlike graphic paper, which gives you a flat, comic finish, the watercolour paper sucks the ink straight out of the nib, giving a deeply saturated and almost painterly effect. Admittedly you get through twice as many pens this way, but I guess that's the price for such a vivid finish.

You can also layer them and, because they flow so well, I've found them very enjoyable to draw with. It's also a much more casual affair than getting out my paints and easel and so on, meaning that time-poor people like me can enjoy doing impromptu little sketches far more often than before.

After my session with Stephanie I had fun banging out this series of informal little sketches at home, mainly to amuse my animal-mad son. I'm sure I'll be playing with these pens some more, when the urge next hits...


Sunday 6 April 2014

Customised Toddler T-shirts

Last weekend I had the idea of making customised t-shirts for my son, which started with a brief flurry of activity using special printer paper that you iron onto fabric such as t-shirts and tote bags, and ended with applique.

For transfers, there are two types of paper available - one is designed for ironing onto white fabric and the other for dark fabric. The white version works by printing in mirror-mode. You have to prepare and print your image as a mirror version of your end result - then you simply place your printed image face down on the t-shirt and iron over it.

This worked pretty well, and I made three animal-themed shirts, all of which went down very well with the microbe...


The dark paper works differently. You print in regular (non-mirror) mode and then peel off an (almost impossible-to discern) backing sheet before ironing the image onto the shirt through a layer of silicone paper.

I'm afraid to say that this stuff was a total flop for me. It seemed like I had to hold the iron over it for a decade before the image would think about adhering to the t-shirt and, even then, it transferred so thinly that the colour of the t-shirt showed through. I don't know what I did wrong. I was sure I'd followed the instructions - but perhaps my iron is just not suitable.


After this failure, I had a much better idea - applique! I'd never done this before but decided to have a go using some of my Liberty scraps.

I used an approach that gives you nice neat shapes with no raw edges. As a first step, you draw your desired shape freehand onto a piece of interfacing. Then you sew it together with a fabric scrap, with the right side facing inwards, stitching all the way around your drawn outline.

As a last step, you cut a slit in the interfacing and turn the while thing inside-out and iron it flat, leaving a lovely applique shape with no raw edges, ready to sew onto the t-shirt. (I attached mine simply by zig-zagging all the way around the edges on my sewing machine)


I love the results of these applique experiments and I'd like to do more.  Next time I might see whether it makes a difference to use iron-on interfacing, to get the applique fully adhered before sewing around the edges.

Friday 31 January 2014

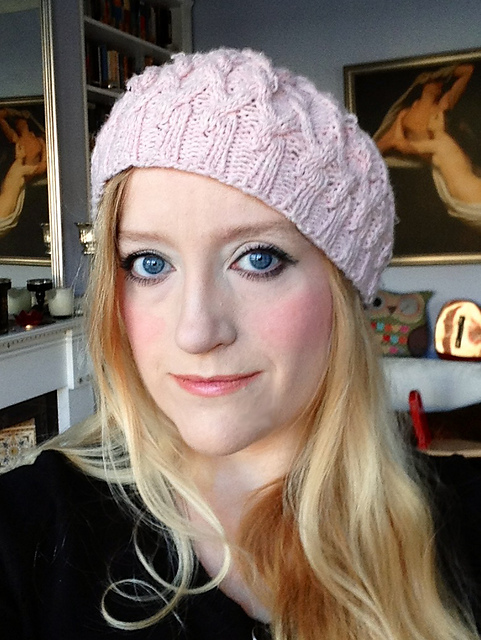
Gretel beret - knitted at last!

It's hard to believe but I actually knat something to completion last week.

We shall not talk about the HEINOUS number of UFOs that continue to languish in every cranny of my flat. It turns out that, if I want to actually complete something, hats are where it's at.

So - here be Gretel...  only 3 years later than intended.

Made using Rowan Silky Tweed in 'Bolero', purchased on a whim thanks to the highly-enabling post-Xmas sale at Black Sheep Wools.  As always, full details are on Ravelry.

When I added this pattern to my queue in 2010 I imagined I'd make it in grey, as with every other thing that I knit for myself.  But in the end I rather like it in pink.  And pink goes with grey...  right?

I decided to use some of the leftover yarn to make a curly scarf to go with it but the finished product isn't quite hitting the spot for me. I think it wants to belong to a small girl, really, so for now it's languishing on a wardrobe shelf.